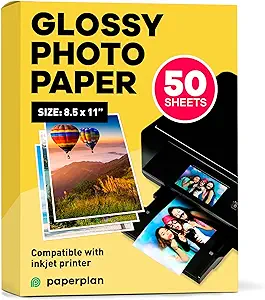
Thank you for choosing our Photo Paper! For the best results, it’s important to use the correct printer setting that is compatible with our product. Below are some key considerations:
1.Open the Printing Preferences/Properties:
-
- Open the document or image you want to print.
- Click on “File” in the top-left corner of your application and select “Print.”
2.Select Printer
-
- Choose the correct printer from the list if you have multiple printers. Confirm that your Inkjet printer is compatible with glossy photo paper.
- Check the printer manual or the manufacturer’s website for information on supported paper types.
3.Paper Type
-
- Locate the “Paper Type” or “Media Type” option. Select “Glossy Photo Paper” from the drop-down menu.
4.Quality Settings
-
- Look for a section like “Print Quality” or “Quality Settings.”
- Choose “Standard” or a similar option for print quality.
5.Color Settings
-
- Find the “Color” or “Color Management” section.
- Select “Vivid Color” or a similar option for vibrant and saturated colors.
6.Print Preview
-
- Some printing dialogs offer a print preview. Take a moment to preview your document to ensure the settings are correct.
7.Print
-
- Once you’ve confirmed all your settings, click the “Print” button. Allow the printed photos to dry completely before handling them. Glossy photo paper may take longer to dry than regular paper.
Troubleshooting
- If the print quality is not as expected, ensure that you are using the correct side of the glossy photo paper. Some photo papers have a printable side, and printing on the wrong side can result in reduced quality.
- Check the ink or toner levels in your printer. Low ink levels can affect print quality. Replace or refill cartridges if necessary.
- If you’re experiencing paper jams, make sure that you are using the correct paper size and that the paper is loaded properly in the tray according to the printer’s specifications.
- If the colors in the printed output do not match what you see on your screen, ensure that your monitor is calibrated. Color calibration tools can help achieve accurate color representation.
- If your prints are coming out in the wrong size, double-check the paper size settings in both your document and the printer settings. Ensure they match.
- If you notice ghosting or double imaging, it could be a sign of a worn-out or damaged imaging drum or roller in the printer. Consult your printer manual for guidance on how to inspect and replace these components.
If you continue to have issues, please don’t hesitate to contact our customer support team [email protected]. We’re here to help!
Please note that the performance of our Photo Paper can vary based on individual printer models, ink quality, print settings, and other factors. Always perform a test print to ensure satisfactory results before printing a large quantity.
